> ## Documentation Index
> Fetch the complete documentation index at: https://docs.righthand.ai/llms.txt
> Use this file to discover all available pages before exploring further.
# Adding a Custom Domain
> Give your Righthands a professional email address on your own domain
## Overview
By default, your Righthands get an email address on a Righthand domain. With a custom domain, you can give them a professional email address that matches your company — so emails from your Righthand look like they're coming from your team.
## Prerequisites
Before you begin, make sure you have:
* Admin access to your Righthand team
* Access to your domain's DNS settings (through your domain provider)
## Why Use a Subdomain?
We strongly recommend using a **subdomain** (e.g., `ai.yourcompany.com`) rather than your primary domain (e.g., `yourcompany.com`). The setup requires adding an MX record, which controls where email for that domain is delivered. If you add an MX record to your primary domain, it can **override your existing email routing** and disrupt email delivery for your entire organization.
Using a subdomain keeps your primary email completely untouched while giving your Righthands a clean, branded address like `avery@ai.yourcompany.com`.
## Adding a Custom Domain
Navigate to the [General Settings](https://teams.righthand.ai/team-settings/general) page in the Righthand platform.
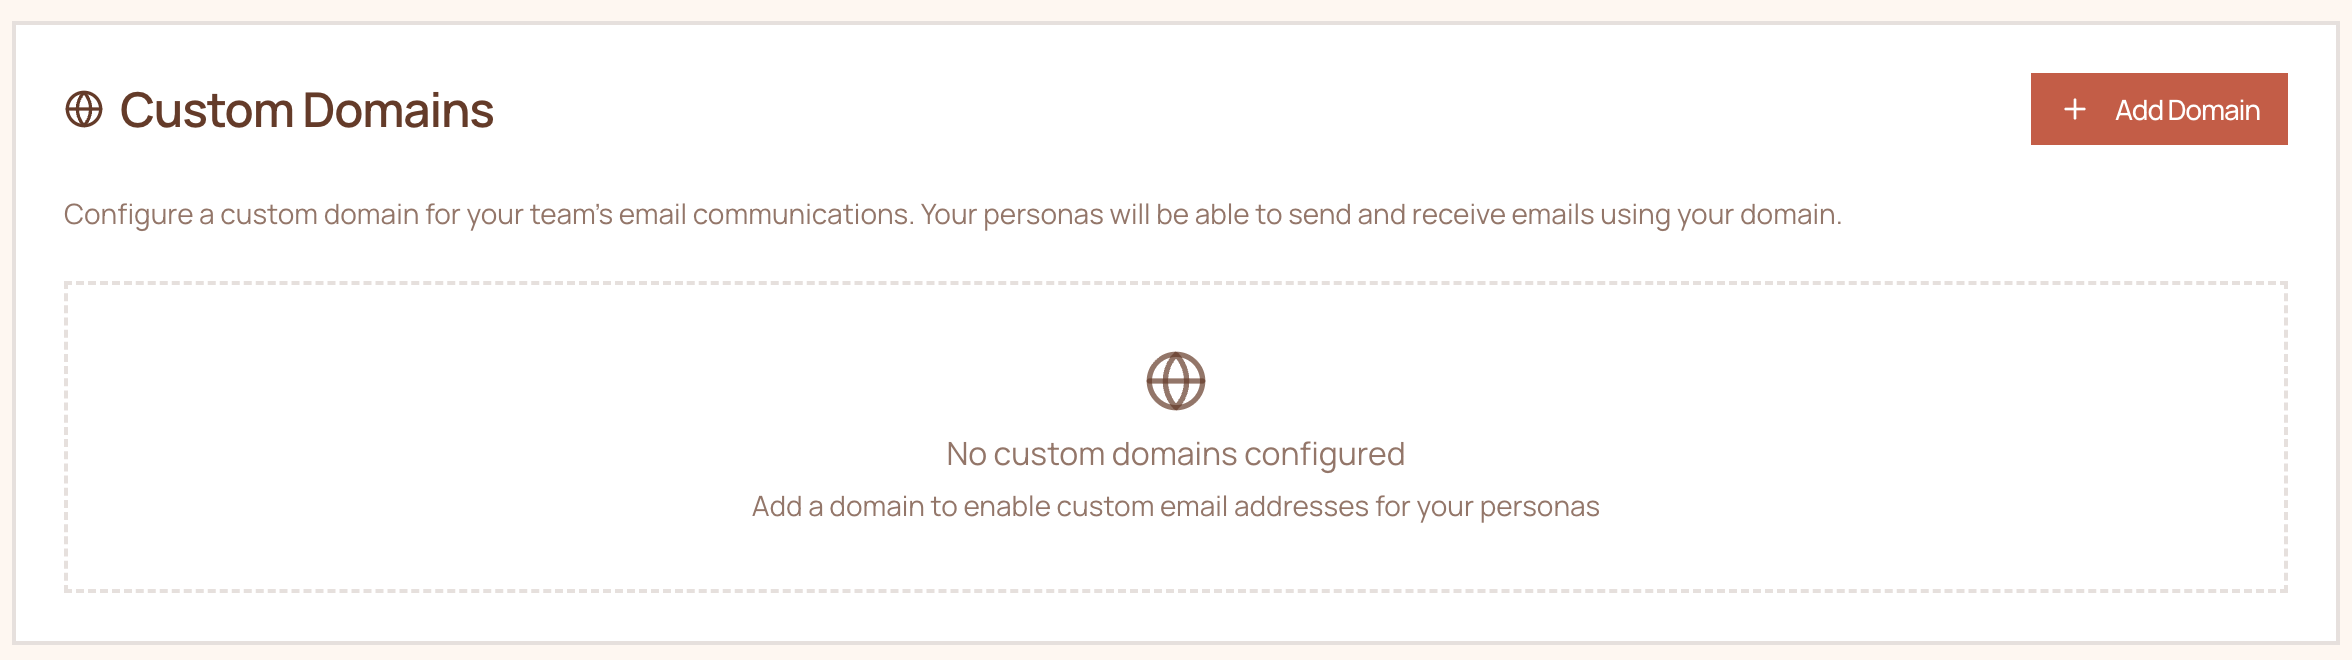
In the **Custom Domains** section, click **Add Domain** in the top right corner.
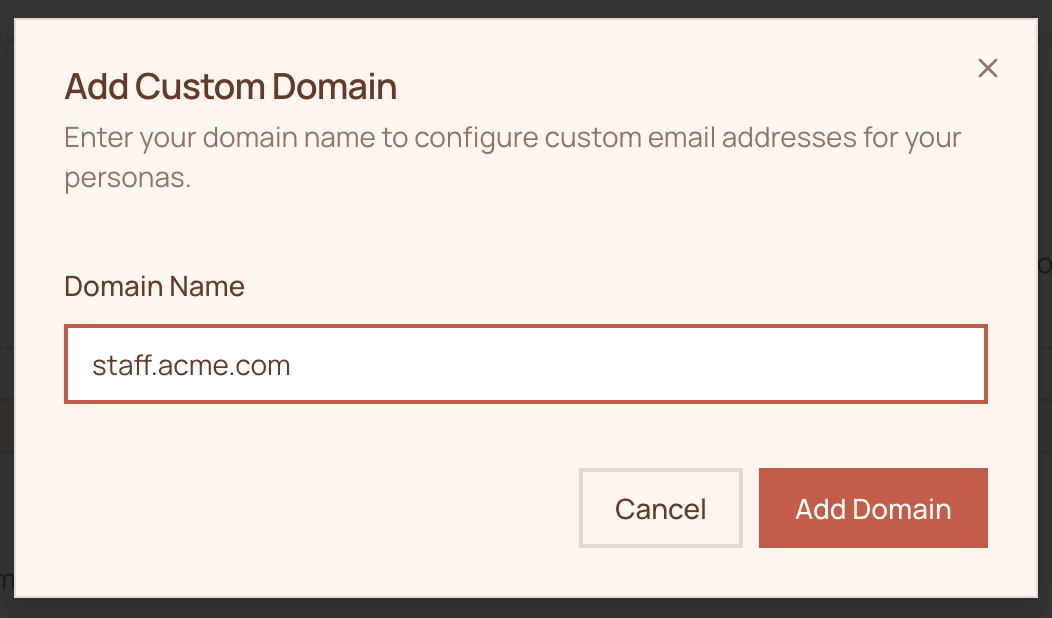
 Type in the subdomain you'd like to use (e.g., `ai.yourcompany.com`) and click **Add Domain**.
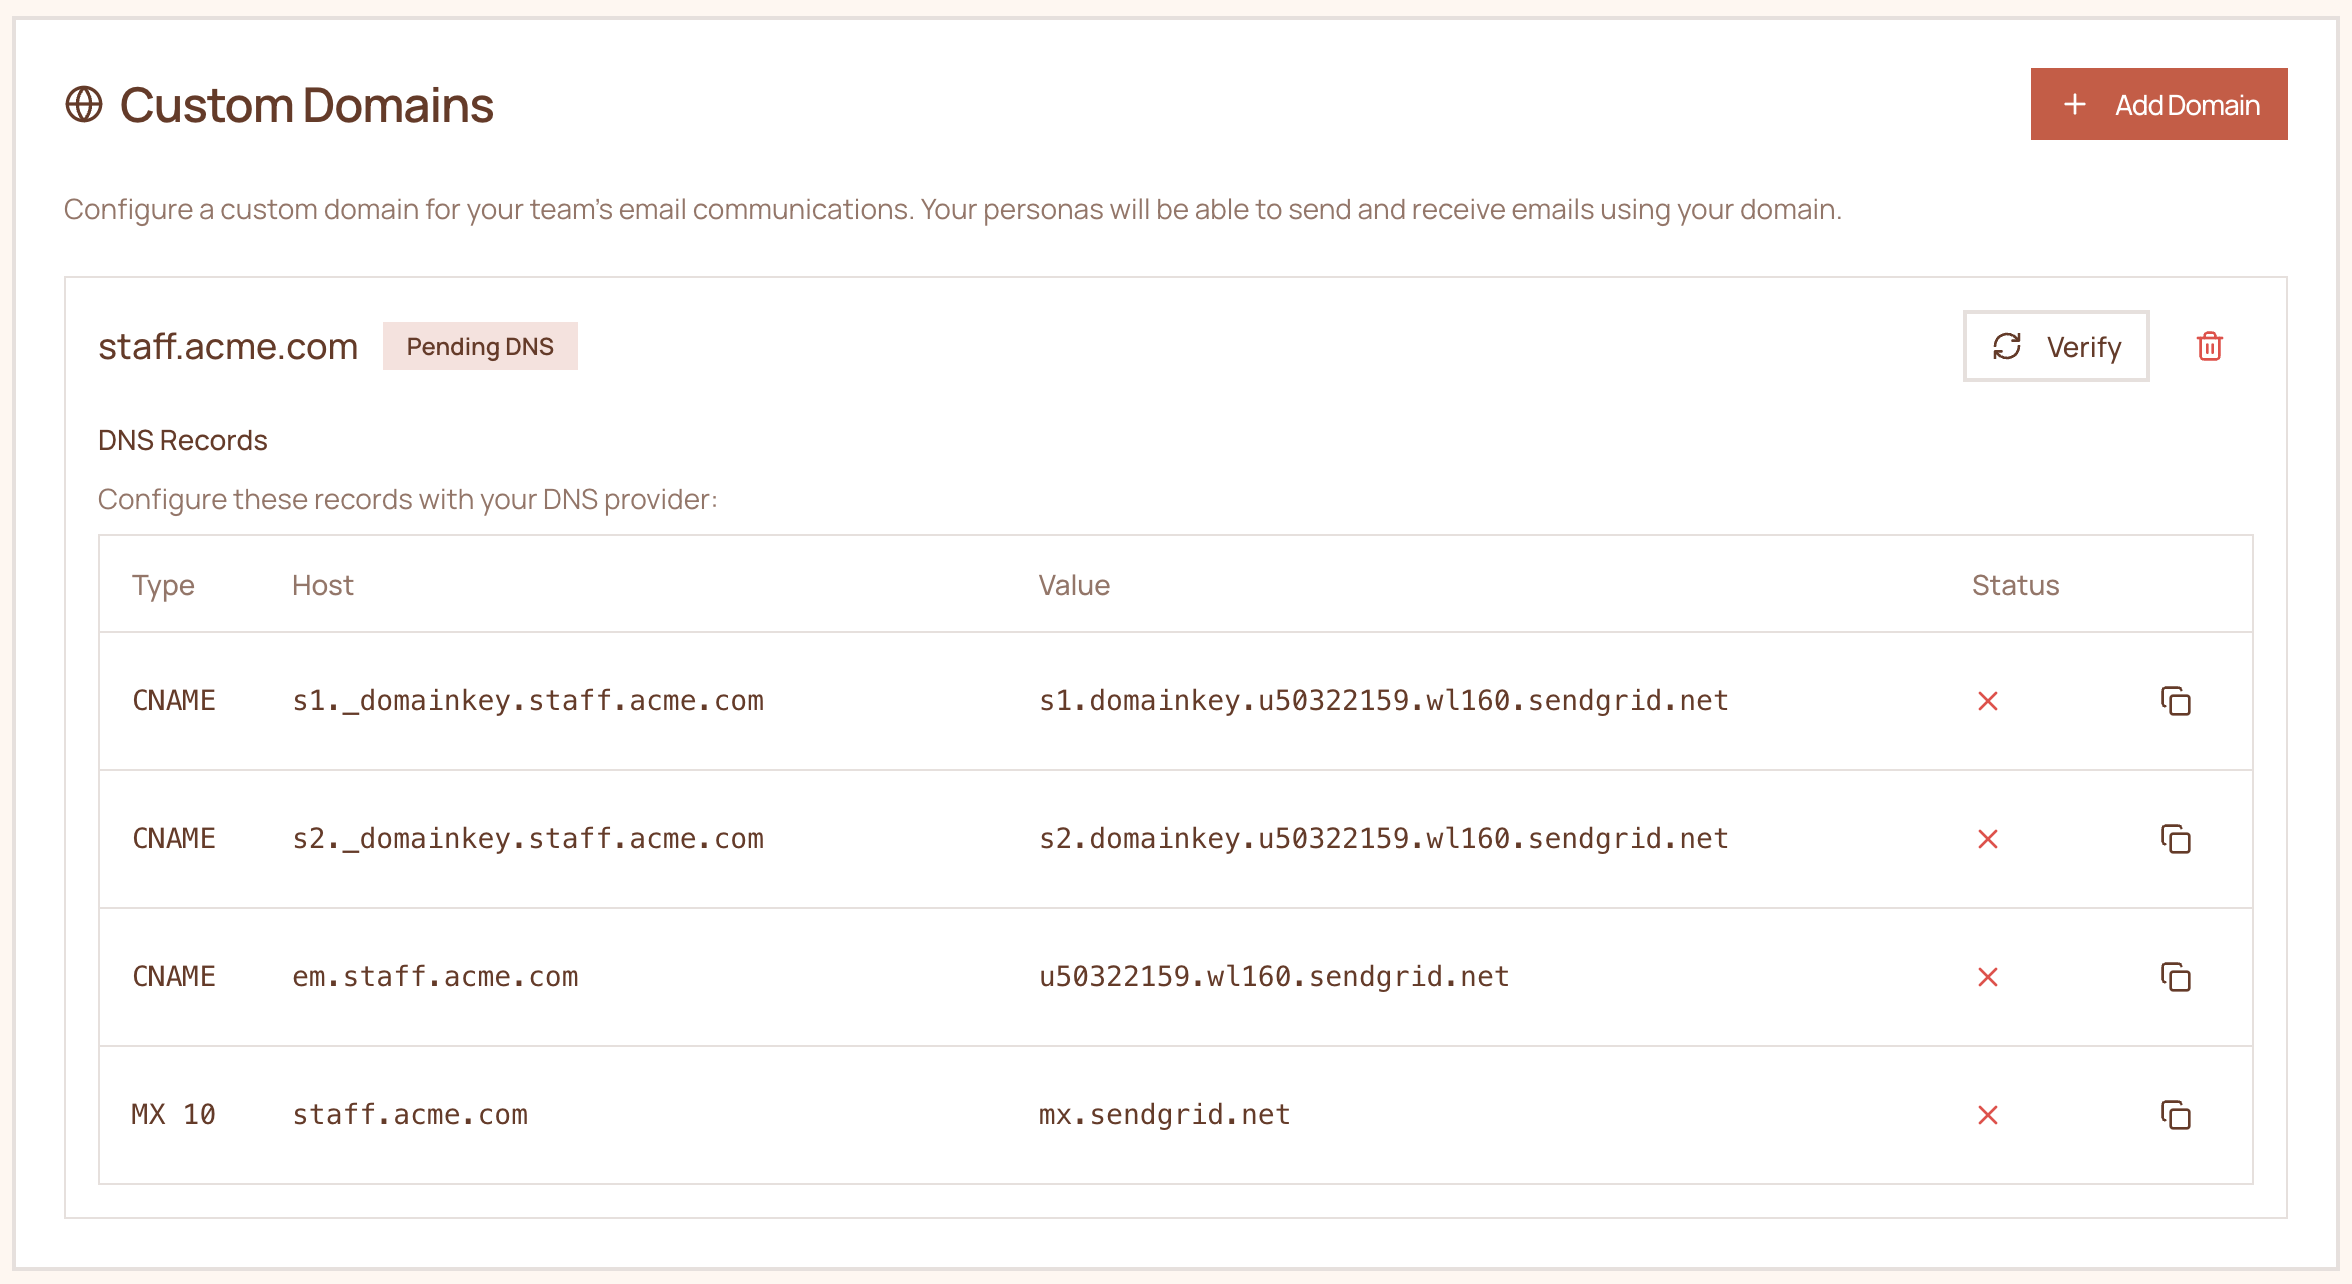
 You'll be shown 4 DNS records to add to your domain provider: **3 CNAME records** and **1 MX record**. Add all of them to your domain's DNS settings.
1. Log in to the [Cloudflare dashboard](https://dash.cloudflare.com) and select your domain.
2. Go to **DNS → Records**.
3. Click **Add record** for each of the 4 records.
4. For CNAME records: set **Type** to `CNAME`, enter the **Name** and **Target** as shown.
5. For the MX record: set **Type** to `MX`, enter the **Name**, **Mail server**, and **Priority** as shown.
6. **Important:** Set the proxy status to **DNS only** (grey cloud) for all records.
1. Log in to [GoDaddy](https://dcc.godaddy.com) and select your domain.
2. Go to **DNS → DNS Records**.
3. Click **Add New Record** for each of the 4 records.
4. For CNAME records: select **CNAME** as the type, then enter the **Name** and **Value** as shown.
5. For the MX record: select **MX** as the type, then enter the **Name**, **Value**, and **Priority** as shown.
6. Save each record.
1. Log in to [Namecheap](https://www.namecheap.com) and go to **Domain List → Manage** for your domain.
2. Navigate to the **Advanced DNS** tab.
3. Click **Add New Record** for each of the 4 records.
4. For CNAME records: select **CNAME Record**, then enter the **Host** and **Value** as shown.
5. For the MX record: select **MX Record**, then enter the **Host**, **Value**, and **Priority** as shown.
6. Save all changes.
1. Log in to [Squarespace Domains](https://domains.squarespace.com) (formerly Google Domains).
2. Select your domain and go to **DNS → Custom Records**.
3. Click **Add Record** for each of the 4 records.
4. For CNAME records: select **CNAME** as the type, then enter the **Host name** and **Data** as shown.
5. For the MX record: select **MX** as the type, then enter the **Host name**, **Data**, and **Priority** as shown.
6. Save each record.
1. Log in to the [AWS Console](https://console.aws.amazon.com/route53) and go to **Hosted zones**.
2. Select the hosted zone for your domain.
3. Click **Create record** for each of the 4 records.
4. For CNAME records: set **Record type** to `CNAME`, enter the **Record name** and **Value** as shown.
5. For the MX record: set **Record type** to `MX`, enter the **Record name** and **Value** (formatted as `priority mailserver`) as shown.
6. Leave TTL at the default and click **Create records**.
You'll be shown 4 DNS records to add to your domain provider: **3 CNAME records** and **1 MX record**. Add all of them to your domain's DNS settings.
1. Log in to the [Cloudflare dashboard](https://dash.cloudflare.com) and select your domain.
2. Go to **DNS → Records**.
3. Click **Add record** for each of the 4 records.
4. For CNAME records: set **Type** to `CNAME`, enter the **Name** and **Target** as shown.
5. For the MX record: set **Type** to `MX`, enter the **Name**, **Mail server**, and **Priority** as shown.
6. **Important:** Set the proxy status to **DNS only** (grey cloud) for all records.
1. Log in to [GoDaddy](https://dcc.godaddy.com) and select your domain.
2. Go to **DNS → DNS Records**.
3. Click **Add New Record** for each of the 4 records.
4. For CNAME records: select **CNAME** as the type, then enter the **Name** and **Value** as shown.
5. For the MX record: select **MX** as the type, then enter the **Name**, **Value**, and **Priority** as shown.
6. Save each record.
1. Log in to [Namecheap](https://www.namecheap.com) and go to **Domain List → Manage** for your domain.
2. Navigate to the **Advanced DNS** tab.
3. Click **Add New Record** for each of the 4 records.
4. For CNAME records: select **CNAME Record**, then enter the **Host** and **Value** as shown.
5. For the MX record: select **MX Record**, then enter the **Host**, **Value**, and **Priority** as shown.
6. Save all changes.
1. Log in to [Squarespace Domains](https://domains.squarespace.com) (formerly Google Domains).
2. Select your domain and go to **DNS → Custom Records**.
3. Click **Add Record** for each of the 4 records.
4. For CNAME records: select **CNAME** as the type, then enter the **Host name** and **Data** as shown.
5. For the MX record: select **MX** as the type, then enter the **Host name**, **Data**, and **Priority** as shown.
6. Save each record.
1. Log in to the [AWS Console](https://console.aws.amazon.com/route53) and go to **Hosted zones**.
2. Select the hosted zone for your domain.
3. Click **Create record** for each of the 4 records.
4. For CNAME records: set **Record type** to `CNAME`, enter the **Record name** and **Value** as shown.
5. For the MX record: set **Record type** to `MX`, enter the **Record name** and **Value** (formatted as `priority mailserver`) as shown.
6. Leave TTL at the default and click **Create records**.
 Wait 1–5 minutes for the DNS records to propagate (in some cases it can take up to 24 hours), then click **Verify**. Once verified, your custom domain will be available as an option when hiring new Righthands in the [Hire](https://teams.righthand.ai/teams/hire) flow.
Need help? Reach out to us at [support@humans.righthand.ai](mailto:support@humans.righthand.ai).
Wait 1–5 minutes for the DNS records to propagate (in some cases it can take up to 24 hours), then click **Verify**. Once verified, your custom domain will be available as an option when hiring new Righthands in the [Hire](https://teams.righthand.ai/teams/hire) flow.
Need help? Reach out to us at [support@humans.righthand.ai](mailto:support@humans.righthand.ai).